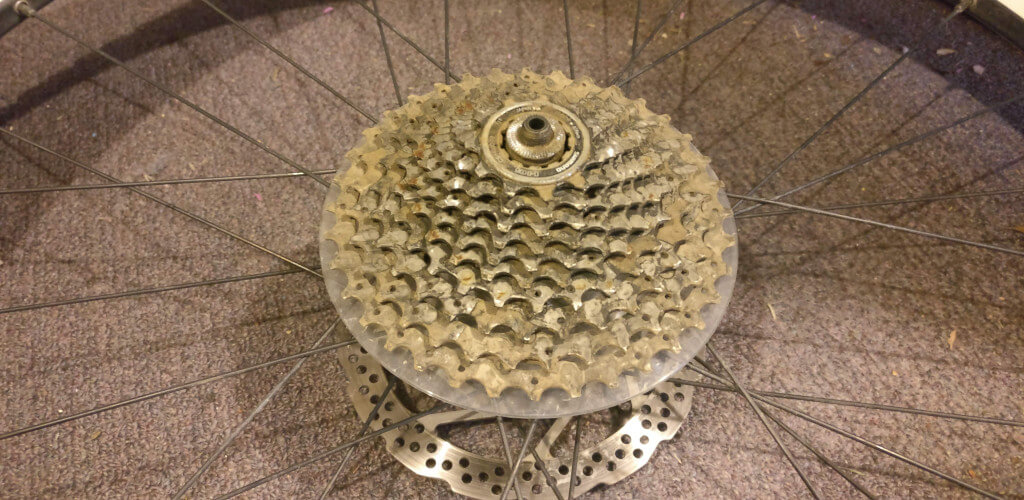
Commonly referred to by mountain bikers as a “dork disc”, the spoke protector is designed to minimize the chance of the rear derailleur being able to move past the lowest gear and cause damage to the rear wheel, and/or the resulting loss of control of the bike.
How do they work?
The humble dork disc is pretty straight forward – it sits behind the rear cassette and provides a hard plastic barrier to deflect your rear derailleur and chain from being able to move past the largest cog on the rear cassette and collide with the spokes of your rear wheel.
The most preventable reason that could cause this to happen is that the rear mech high/low limit screws are not correctly set up – meaning that just by shifting to your easiest gear, your derailleur is actually able to shift past that biggest gear, and fall off the back into your spinning wheel. Not good!
But it’s worth keeping in mind that even if you do have your bikes gear shifting set up correctly there are a couple of other ways that your derailleur could make contact with your wheel.
If you have had a crash and unknowingly bent your rear deraillier (or rear derailler hanger – the bit that your rear mech attaches to on your bike, which is designed to take damage that your frame might otherwise), this could mean that when you jump back on your bike and start riding again that the your rear mech is now able to collide with your spokes.
Similarly, as we all know mountain biking usually involves rough terrain with all sorts of rocks and sticks all over the place – and it is possible for some object like this to smack into your rear derailler while riding and force it into your wheel.
Why is it important to prevent the rear mech from hitting your wheel?
There are two main reasons that you don’t want your rear mech to get caught up in the spokes of your spinning rear wheel.
- It can cause the rear wheel to lock up, potentially causing you to lose control of your bike at speed, and causing injury or worse.
- It will likely cause a lot of damage to your rear derailleur and wheel – both of which are often expensive parts to repair or replace. This will usually end your days riding even if you’re not injured in the process.
Do you need to keep the dork disc on your bike?
It is certainly designed to stay on your bike as a safeguard, however many riders feel that if the rear derailleur is properly set up using the high / low limit screws this should be enough to prevent your rear mech from being able to easily be shifted past the cassette and collide with your wheels spokes in the first place.
(Of course this doesn’t stop the aforementioned crash or rock/branch related issues from causing issues – but every rider needs to weigh up the risk / benefit for themselves).
Most casual bicycle riders never think twice about keeping it on their bike – or doing much in the way of other bike modifications for that matter – however many avid mountain bikers do choose to remove them.
Why do some mountain bikers remove this plastic disc?
There are a number of reasons that lead mountain bikers to want to remove the plastic disc from their wheel, which basically come down to:
- They don’t like the look of a cheap plastic wobbly disc on their beloved customized (and often very expensive) mountain bike.
- The spoke protector disc can become loose and rattly over time. Most mountain bikers want to silence as many of the random noises on their bike as possible.
- It can accumulate more mud and other trail debris, combined with old chain oil and so on, making it a little harder to clean that area of the cassette.
- It adds a little bit of weight to the bike, which some riders view as unnecessary.
It’s always going to come down to a personal decision on whether to remove the disc from your bike, weighing up how much those things mean to you, versus the safety aspect, and how confident you are that your bike is correctly set up.
Personally, I’m a reasonably confident bike mechanic through just wrenching on my bikes over the years, and I do remove them from all of my mountain bikes – for all of the reasons mentioned above really.
I’ve never had an issue so far, but have heard of others having pretty nasty crashes as a result of a mech getting mangled in their rear wheel – either through shifting issues or getting physically knocked into the wheel, so it is a real thing to consider.
How to remove a dork disc
If you’ve decided you do want to remove the disc from your wheel, you might be wondering what the best method to do it is.
Many riders first thought is just to try breaking it apart while it’s still attached to the bike, as it usually made of hard plastic that can be broken piece by piece with pliers or something similar.
There is however a much better way!
You’ll need a few tools – a couple of which if you’re just getting into mountain biking you might not have yet – but they’re inexpensive and handy to have if you plan to ever do any maintenance or upgrades to the drivetrain of your bike, specifically the rear cassette.
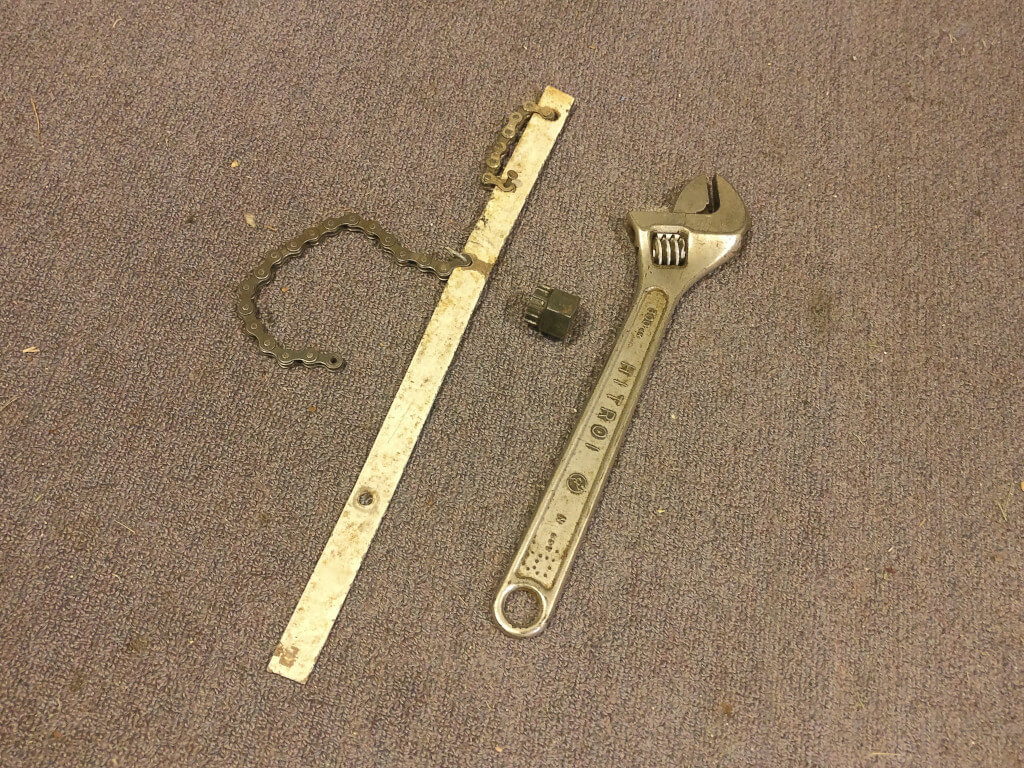
Tools you’ll need:
- Chain whip (either purchased new, or DIY one cobbled together from an old chain and a piece of steel like mine!)
- Cassette removal tool
- Adjustable wrench
Dork disc removal process:
Firstly, take your rear wheel off the bike if you haven’t already.
Next you’ll just put the splined cassette removal tool into the lockring of your cassette.
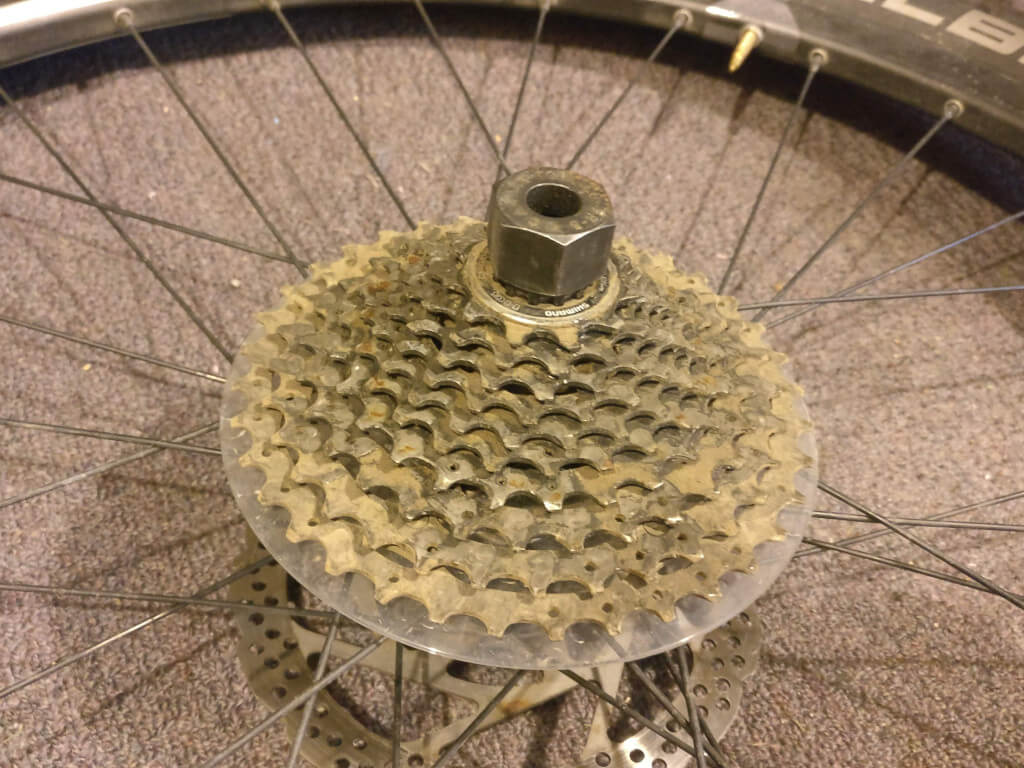
Then using the adjustable wrench, make sure you’ve got a good hold of the cassette removal tool. The cassette lockring needs to be spun anti-clockwise to loosen and remove it, as it’s just a normal thread, but of course the cassette will just want to spin freely anti-clockwise, so this is why we need a chain whip.
Position the chain whip so that a short length of chain is wrapping around part of the cassette, and so that it allows you to prevent the cassette spinning anti-clockwise by holding the chainwhip firmly with one hand.
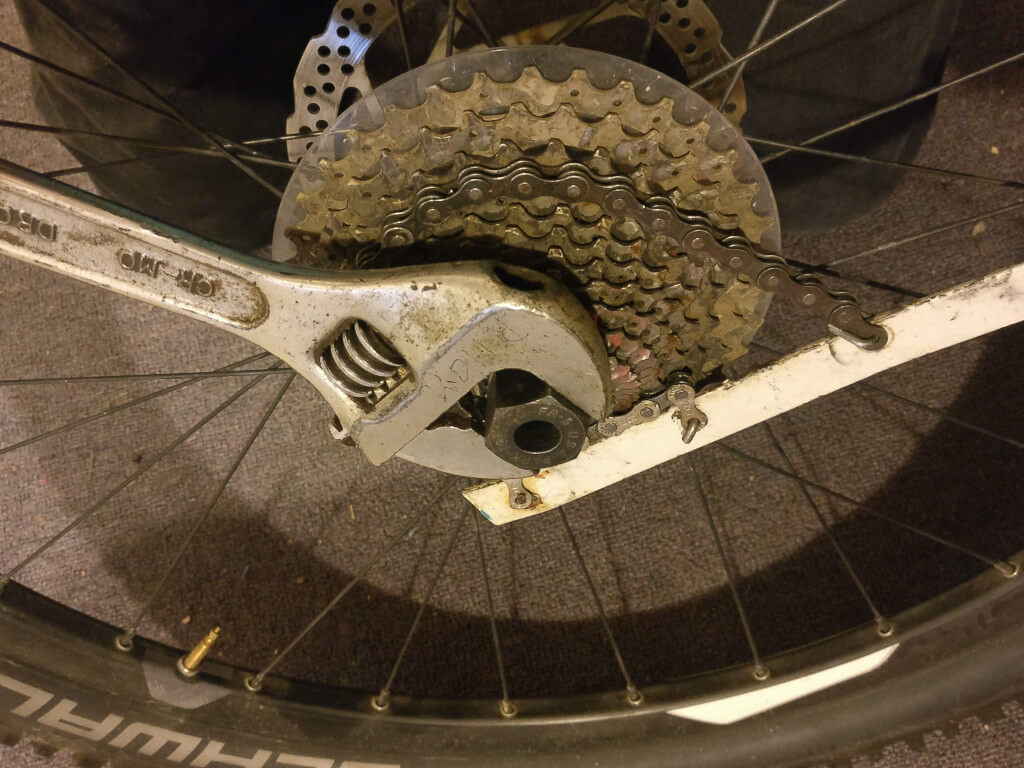
The idea now is that you’ll be able to use that as leverage to start applying some pressure to the adjustable wrench handle, and start undoing that lockring.
Make sure you are mindful of what direction your hands will go if something slips, as you do NOT want to end up slamming your hand or forearm etc down onto the sharp teeth of the cassette.
The cassette lockring might take a fair bit of force to start moving initially, particularly if it has been done up very tight originally, or the bike is older and the cassette hasn’t been removed in years. You may find you even need some WD-40 or something similar on that lockring to get it to budge if it is totally seized.
Once it starts moving however it should easily unwind, and you can remove the lockring and place to one side.
You’ll then be able to remove the cassette from the bike.
Depending on the design and expense of your cassette, it may be in one solid piece, or may be made up of many individual cogs and spacers – if it is the latter, you’ll probably want to make sure you hold it all together with both hands when you’re removing it, and carefully place off to one side on a flat surface in one stack. This will allow you to easily pick it up and place the whole lot back on the bike without having to sort through everything to reassemble it correctly if you’re not familiar with how they go together.
Now you should simply be able to twist the plastic disc to remove its clips from the back of the cassette and fling it away from your bike.
Then you can just slide the cassette back onto the wheel hub you removed it from, retighten the cassette lockring to the recommended torque setting of the manufacturer (I just give it a solid bit of weight on the handle of the adjustable wrench so it is nice and tight), reattach the wheel to the bike and you’re back riding in no time at all!